Did you know that lithium starter batteries can cut cranking time by up to 50% compared to lead-acid? We approach installation with precise seating, secure mounting, and protective covers to resist vibration and corrosion. We’ll wire correctly, verify voltages, and apply a controlled charge, ensuring solid grounding and minimal losses. There are critical steps that determine reliability under cold starts and parasitic draw—and we’ll outline them as we proceed. Let’s get into the details that keep your engine ready.
Key Takeaways
- Follow safety gear and proper isolation steps; disconnect negative first, then positive, to minimize arc risk during removal.
- Confirm seating, mounting, and bracket engagement; ensure the unit sits flush with protective covers in place.
- Wire the system with correct sizing, perform a controlled initial charge, and verify voltages across cells and main output.
- Establish grounding and clean lugs; monitor current decay and voltage rise to target values without overshoot.
- Conduct post-install tests, check for proper cranking, inspect for corrosion, and schedule routine maintenance.
What Makes Lithium Starter Batteries Different
Lithium starter batteries differ from traditional lead-acid packs in how they store and deliver energy, offering higher energy density, faster charging, and longer life with lighter weight. We, as installers, examine chemistry, performance envelopes, and practical implications for engines. What makes lithium starter cells capable is their ability to supply high current bursts with stable voltage early in crank, aided by low internal resistance and robust thermal management. They tolerate wide temperature ranges and maintain capacity over many cycles, reducing replacement frequency. We also consider system integration: battery management needs, proper charging profiles, and protective circuitry to prevent over-discharge. In our assessment, lithium starter technology delivers predictable cranking performance, improved weight distribution, and fewer maintenance events, aligning with modern vehicle electrical architectures while preserving reliability.
Check Vehicle Compatibility Quickly
How can you quickly verify compatibility before swapping to a lithium starter battery? We begin with model year, engine type, and existing electrical system. We confirm the battery’s CCA, RC, and AH ratings align with the vehicle’s specifications and starter draw. We compare terminal layout and size to ensure fitment without adapters. We verify alternator output meets the charger requirements and that the vehicle can tolerate lithium chemistry, including any immobilizer or ECU considerations. We check compatibility of fast charging capability, ensuring the vehicle’s charging system supports the lithium starter’s accepted voltage and current windows. We review warranty terms for installation conditions, return policies, and lifecycle coverage. Finally, we document the process for traceability and future reference.
Choose the Right Lithium Starter Battery
We start by ensuring the battery chemistry matches our system and that the chosen lithium starter aligns with the vehicle’s requirements. Next, we verify capacity and CCA ratings so the pack can reliably start the engine under expected conditions. We’ll keep the selection focused on compatibility, performance, and clear specification alignment.
Battery Chemistry Match
Choosing the right lithium starter battery starts with matching the chemistry to your system’s voltage, current demands, and charging profile. We assess battery chemistry to ensure stable performance across temperatures, consistent discharge needs, and compatible charging algorithms. For starter compatibility, we verify that the cell chemistry aligns with the vehicle’s alternator feedback, BMS expectations, and ECU input thresholds. We prioritize chemistries with proven cold-crank performance, rapid transient response, and safe heat management. We also consider overall system integration: charger compatibility, protection features, and lifecycle expectations. By documenting your voltage window, maximum discharge rate, and recharge efficiency, we narrow options to batteries that maintain voltage under load and accept the vehicle’s charging profile. This disciplined comparison prevents mismatches and supports reliable ignition and operation.
Capacity and CCA Alignment
Evaluating capacity alongside Cold Crank Amps (CCA) is essential to ensure the battery can sustain starter current during cranking and maintain voltage under load. We focus on capacity alignment to match the vehicle’s demand and ensure reliable starts, especially in extreme temps. Our method confirms the lithium starter battery’s high-discharge capability aligns with the starter motor’s current profile, avoiding voltage sag that undermines ignition perception. CCA alignment ensures instant torque at crank, while capacity alignment guarantees endurance through repeated cycles. By validating both metrics, we reduce heat buildup, extend cycle life, and preserve ancillary electronics.
- Confirm that rated capacity meets or exceeds the starter motor’s draw across operating temperatures
- Verify CCA alignment with cold-start requirements and battery internal resistance
- Correlate real-world cranking events with manufacturer test data for consistent performance
Safety Checks Before Removal and Installation
We verify our safety gear is present and fits correctly before any work begins. We then disconnect power safely, following manufacturer guidance and using proper PPE. Finally, we confirm the battery is positioned correctly to prevent movement during removal and installation.
Inspect Safety Gear
- Before handling any removal or installation steps, we verify our safety gear is in good condition and properly positioned. We approach this with a disciplined checklist to ensure we can perform gear handling without risk. We inspect safety equipment for wear, secure fit, and functional indicators before touching the battery system. Proper PPE reduces exposure to sparks, fumes, and metal shards, and keeps hands and eyes protected throughout the process. We confirm gloves, eye protection, and sleeves align with the task and stay undamaged during handling.
- Inspect safety gloves for tears and grip integrity
- Confirm eye protection provides full seal and clear visibility
- Ensure sleeves and jackets remain uncontaminated and properly fastened
Disconnect Power Safely
To begin disconnecting power safely, we verify the system is de-energized and isolate the battery from all power sources. We follow a controlled sequence: shut down ancillary circuits, disconnect charge sources, and confirm no residual current via a multimeter. We then prepare our safety checklist and put on safety gear before any contact with terminals. Next, we identify the correct terminals, loosen fasteners in a consistent pattern to reduce torque shock, and avoid metal-to-metal bridging. We carefully remove the negative cable first to minimize arc risk, then the positive, keeping tools insulated and clear of conductive surfaces. We store removed components in a designated area and document any irregularities for maintenance records, ensuring the procedure remains repeatable and traceable.
Verify Battery Position
Have you confirmed the battery is correctly seated and oriented before removal or installation? We verify position to prevent shorts, misalignment, or cable strain. Our check ensures the case, terminals, and mounting hardware align with vehicle guides, and that venting paths remain clear. Improper seating can cause heat buildup or electrolyte leakage, while incorrect orientation may stress connectors. We avoid irrelevant topic and extraneous detail, focusing on verifiable cues: label alignment, terminal polarity, and bracket engagement. We document any anomalies before proceeding, then correct them. Precision here reduces risk and preserves battery performance during removal or installation.
- Ensure terminal posts face the correct direction and mount points align with the tray
- Confirm the bracket locks fully and the battery sits flush with adjacent components
- Check for clear venting paths and no clearance interference
Remove and Fit the Battery Step by Step
We’ll start by safely disconnecting and removing the old battery, then fit the new one in the correct orientation. We proceed in a controlled sequence: disconnect negative terminal first, then positive, and isolate cables to prevent contact. Remove mounting hardware, lift the pack straight up with balanced support, and verify clear clearance from surrounding components. Inspect terminals and tray for corrosion or damage; clean as needed, using approved contact cleaner if required. Align the new battery with the tray, ensuring terminals point toward the vehicle’s cable routes. Reinstall mounting brackets securely, then reconnect the positive terminal followed by the negative, tightening to spec. Return any removed fender covers or shields, confirm seating, and verify that the unit sits flush. Note: not relevant, unrelated topics.
Wire, Charge, and Verify Voltages for Reliability
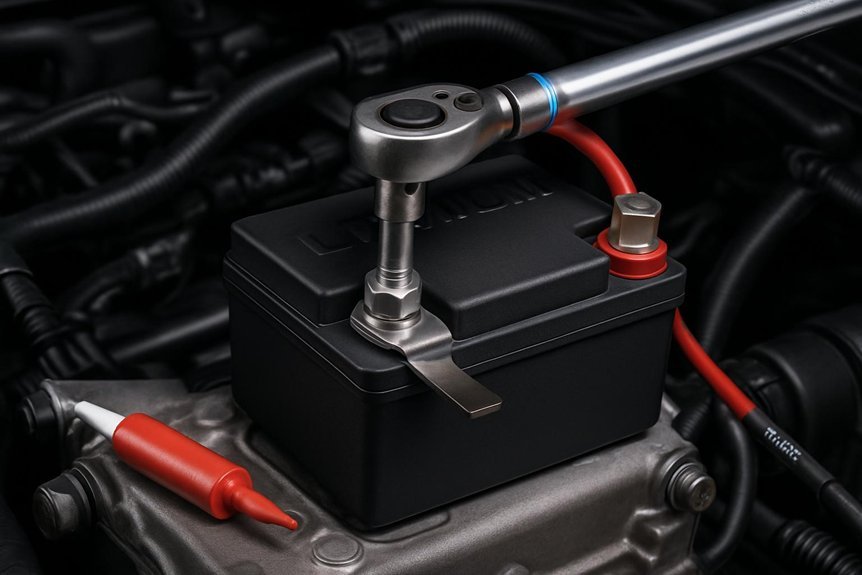
After confirming the battery is properly seated and secured, we wire the system, apply a controlled charge, and verify voltages for reliability. We ensure correct wire sizing to minimize resistance and heat, then connect battery leads to the chassis ground and power bus with clean lugs. During charging, we monitor current decay and voltage rise to reach manufacturer-specified targets without overshoot. Voltage stability is checked across all accessible cells and the main output, confirming no hotspots or erratic readings. We document baseline measurements for future comparisons and use calibrated tools for accuracy. Any deviation triggers recheck of connections, insulation integrity, and protection devices to preserve reliability.
- wire sizing ensures minimal losses and consistent readings
- voltage stability confirms balanced cell performance
- documented baselines enable reliable maintenance comparisons
Manage Surge, Cold Starts, and Safety Precautions
Surges and cold starts can stress a new car lithium starter battery, so we implement controlled procedures to manage inrush, minimize damage, and guarantee safety. We apply surge management by sequencing accessory loads before crank and limiting peak current with manufacturer-approved controllers. During cold starts, we enable optimized cranking profiles and temperature-aware thresholds to sustain voltage during ignition. Our protocol prioritizes clean connections, secure mounting, and minimal parasitic draw to prevent sudden discharge. We monitor voltage sag, current spikes, and ambient temperature, documenting deviations for review. Safety precautions include proper PPE, disabled chargers when connectors aren’t seated, and adherence to battery-specific thermal limits. We commit to cold start optimization through calibrated preheating, when applicable, and immediate fault isolation if abnormal readings appear.
Post-Install Test, Maintenance, and Common Troubleshooting
With the system installed, we’ll verify that all connections remain secure and that the battery remains properly mounted while the vehicle is at rest. We then perform start up diagnostics by turning on the ignition briefly to confirm proper voltage, amperage response, and indicator lights, noting any anomalies. Inspect terminals for any signs of corrosion and confirm protective caps or covers are in place to support corrosion prevention. Monitor for consistent cranking effort and absence of abnormal dwell or click sounds. Schedule routine checks for cable tightness and mounting integrity, especially after vibration events. If faults appear, isolate circuitry, re-tighten connections, and retest before road use.
- Verify secure mounting and clean terminals to support corrosion prevention
- Run controlled start up diagnostics to ensure consistent cranking
- Schedule periodic maintenance and inspect for loosened connections
Frequently Asked Questions
How Long Does a Lithium Starter Battery Typically Last?
We typically expect lithium starter batteries to last 5–10 years. We monitor lithium lifecycle factors, and we note warranty differences across brands. We’ll track usage, charging, and temperature to optimize longevity, and advise on replacements as needed.
Can Lithium Starters Be Jump-Started With Lead-Acid Vehicles?
We can, but with caveats: we’ll treat it like a distant omen, and proceed carefully. Lithium safety and charging compatibility demand strict limits; jump-starting with lead-acid isn’t recommended, we’ll use proper equipment and protocol for safety.
Are Warranties Different for Lithium vs. Traditional Starters?
Yes, warranties differ: lithium starters typically have specific warranty coverage distinct from traditional starters, and you’ll see clear warranty exclusions. We outline coverage terms, exclusions, and claim processes to ensure you understand how your warranty applies.
Do Lithium Starters Require Special Charging Equipment?
Yes, do lithium starters require special charging equipment? Yes, we insist on appropriate charging equipment. We’ll handle it like a calibrated instrument, ensuring precise monitoring, proper termination, and safe charging to protect do lithium starter batteries and longevity.
What Signs Indicate a Failing Lithium Starter Battery?
We’ll spot signs of a failing lithium starter battery: dimmed or slow cranking, error codes during diagnostic tests, fluctuating voltage, frequent resets, and inability to hold peak charge; check warranty coverage for replacements and service limits.
Conclusion
We’ve walked through every step with careful intent, and the payoff is a dependable start, not a gamble. As you wrap up, treat every connection as a sealed promise—tight, clean, and corrosion-free—so parasitic draws fade from memory. Think of the test results as the quiet proof of readiness: voltages stable, nothing warm, and grounds solid. If anything glimmers off, don’t rush—recheck, reseat, and resume. Your battery’s reliability deserves nothing less than meticulous care.

