We’ll walk you through choosing the right motorcycle lithium battery with precise compatibility checks, careful planning, and strict safety measures. We’ll outline how to verify chemistry, capacity, form factor, voltage, C-rate, and connectors, then design a wiring diagram with proper fusing and routing. We’ll set a secure mounting location, plan heat protection, and document polarity checks, torque specs, and service intervals. Stay with us as we balance reliability and roadworthiness, and uncover the critical steps that keep your system safe and dependable.
Key Takeaways
- Assess battery chemistry, voltage, capacity, C-rate, and form factor to match motorcycle electrical system and riding needs.
- Plan installation with a clear wiring diagram, proper routing, fuse protection, and correct polarity to prevent miswiring.
- Choose a location minimizing heat, vibration, and moisture, while keeping short, clean harness runs and accessible service points.
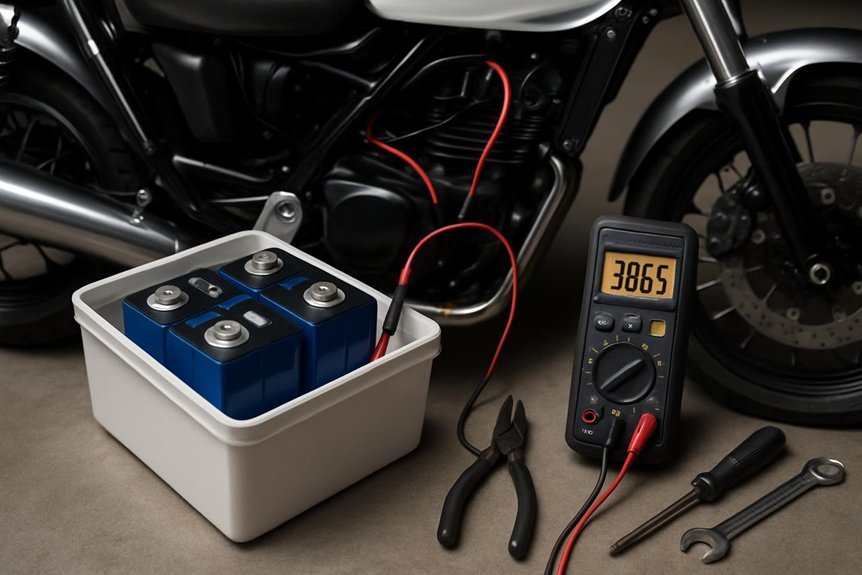
- Gather safety gear and tools (insulated gloves, non-conductive mats, multimeter) and follow torque specs and secure mounting.
- Perform staged charging and diagnostic checks, monitor heat/odor, and document service intervals and replacement timelines.
How to Choose the Right Motorcycle Lithium Battery: Key Criteria and Compatibility
Choosing the right motorcycle lithium battery starts with matching chemistry, capacity, and form factor to your bike and riding needs. We evaluate compatibility criteria by confirming voltage, C-rate, and connector types match your bike’s electrical system. Next, assess discharge rates to ensure sustained cranking and peak loads without voltage sag. We prioritize high-drain performance for sport and touring applications, while maintaining adequate reserve capacity for accessories. Battery chemistry should align with charging algorithm compatibility and thermal behavior under typical ambient conditions. Consider cycle life, warranty, and maintenance requirements, balancing weight savings against rigidity of installation. Ensure size and mounting orientation fit the space and securing points without stressing terminals. Finally, verify compatibility with your charger, ECU, and regenerative features to prevent misfiring or alarms.
Essential Tools and Safety Gear for Installation
What essential tools and safety gear do we need to install a motorcycle lithium battery properly and safely? We approach this with precision: we confirm compatibility first, then gather required items. Tool selection should emphasize a metric toolkit with wrenches, hex bits, and a torque screwdriver, plus insulated pliers and a multimeter for voltage checks. Non-conductive mats or a labeled work surface protect components. We include battery terminal protection, heat-resistant gloves, and eye protection to guard against sparks. A wire cutter and electrical tape ensure clean terminations, while cable ties secure routing. A battery isolator or fuse kit helps prevent shorts. Keep a flashlight or headlamp for low-light conditions. Remember, safety gear and tool selection drive reliability and reduce risk during installation.
Plan the Install: Battery Location, Wiring Diagram, and Mounting Preparations
We’ll start by outlining the ideal battery location, ensuring clearance from heat, vibration, and moisture, while prioritizing ease of access for future service. Next, we’ll translate that plan into a clear wiring diagram that shows positive and negative runs, fuse protection, and routing paths that avoid pinching or chafing. Finally, we’ll verify mounting preparations with a secure bracket, proper fasteners, and strain relief to prevent movement under riding conditions.
Battery Location Planning
Before we start, consider how the battery’s location will impact wiring, weight balance, heat management, and service access. Our planning prioritizes compact, secure placement that preserves weight distribution and allows quick service. We evaluate enclosure fit, vibration tolerance, and accessibility for venting and maintenance. We account for battery chemistry implications on venting and thermal load, ensuring proper clearances and protection from impact. We position the pack to minimize harness length while avoiding heat sources and exhaust paths. We document mounting coordinates, hardware type, and routing constraints to support a clean, safe integration.
| Location study | Key considerations |
|---|---|
| Front frame area | Short leads, heat isolation |
| Under-seat pocket | Accessibility, airflow |
| Tail section | Containment, balance |
| Side panels | Protection, wiring route |
| Tank cradle | Structural compatibility |
Wiring Diagram Essentials
Wiring Diagram Essentials establish a precise, safety-focused roadmap for how the battery integrates with the motorcycle’s electrical system. We map the circuit path from the main power source to outputs, noting fuse placement, relays, and ground continuity. We verify the wiring diagram reflects your model’s harness color codes, connector types, and pinouts to avoid miswiring. We confirm battery compatibility by cross-referencing voltage, capacity, and discharge rates with our bike’s electrical load, including lighting, ECU, and charging system. We document polarity conventions and impedance considerations to minimize parasitic draw. We prohibit ad hoc splices and untested adapters, ensuring secure routing away from heat and moving parts. Finally, we keep a dated diagram for future maintenance and diagnostics.
Mounting Preparations Checklist
Planning the install starts with choosing a secure battery location, verifying that the route supports proper cooling and accessibility for maintenance, and ensuring no interference with moving parts or heat sources. We outline the mounting preparations: select a stable mounting surface, confirm flatness, and anticipate vibration isolation needs to protect the cell pack. Secure fasteners, spacers, and isolation pads are required to minimize flex and moisture ingress. Route wires to avoid sharp edges and hot surfaces, leaving slack for thermal expansion. Use a brief test fit before final tightening, then recheck clearance to belts, sprockets, and exhaust. Table provides a quick reference for position, fasteners, and isolation method.
| Position | Fasteners | Isolation Method |
|---|---|---|
| Front-right | 6 mm bolts | Rubber pad |
| Under-seat | Nylock nuts | Polyurethane spacer |
| Tail area | stainless screws | Foam gasket |
| Battery tray | washers | Anti-vibration pad |
Install the Lithium Battery: Step-by-Step Guidance
We’ll begin by confirming the motorcycle’s battery cavity is clean, dry, and free of corrosion, then verify the compatibility of the lithium battery model with our bike’s charging system and frame fit. We approach installation with precise steps: remove any remaining old hardware, align the lithium unit to the chassis guides, and reseat connectors using minimal force. Verify voltage compatibility and secure the mounting hardware to the specified torque. Confirm that the battery terminals align with the loom and fuse block without contact risk. Recheck clearance from frame, exhaust, and moving parts. Maintain battery safety throughout handling, using insulated tools and proper PPE. After installation, follow disposal protocol for any packaging or defective parts, and document the procedure for future service.
Wiring, Charging, and Getting Your Bike Started: Quick Tips
After confirming the battery is securely installed, we’ll inspect all wiring routes for clean, dry, and unexposed paths, then verify that the lithium battery’s output, charging system, and alternator compatibility align with the bike’s electrical specifications. We’ll follow precise polarity checks, fuse integrity, and secure harness routing to minimize vibration. We’ll connect a calibrated multimeter to confirm voltage and resting current, then perform staged load testing within manufacturer guidelines. While charging, we’ll monitor for abnormal heat, swelling, or odors, stopping if any warning appears. Starting procedures demand a brief engine crank to confirm starter draw remains within spec, then a controlled ignition sequence. We’ll document results, ensure protective covers are reinstalled, and avoid overcharging, maintaining two word, two word safeguards for optimal performance.
Maintenance and Care for Lithium Batteries: Tips and Troubleshooting
Maintaining lithium batteries requires disciplined care to preserve performance and safety. We, as riders and technicians, approach maintenance with methodical checks and precise procedures. Regularly inspect terminals for corrosion and secure connections, then clean using a manufacturer-approved contact cleaner. Monitor voltage levels and temperature during charging, and avoid deep discharges that shorten life. Schedule monthly maintenance to verify state of health, electrolyte status (where applicable), and protective enclosure integrity. Use a compatible charger that prevents overvoltage, and disconnect if cell balance becomes abnormal. For storage tips, keep batteries in a cool, dry environment, partially charged if long-term storage is planned, and protect against moisture and impact. Document service intervals and replace aging packs per spec to sustain reliability and safety.
Common Issues and How to Diagnose Them
Common issues with motorcycle lithium batteries arise from improper charging, poor connections, and environmental stress, so diagnosing them quickly minimizes downtime. We approach diagnosis methodically, prioritizing safety and precision, and we’ll flag irrelevant topics that distract from real faults. Key signs include voltage drop under load, intermittent starts, and unexpected resets, which point to parasitic or stray voltage concerns. Now, a concise diagnostic table follows to aid your workflow.
| Symptom | Likely Cause | Quick Test |
|---|---|---|
| No crank/low cranking | Disconnected/loose bus, bad main fuse | Check terminals, reseat, test with multimeter |
| Frequent resets | High resistance path, parasitic draw | Inspect mounting, measure current draw |
| Cranks weakly | Damaged cell, internal impedance rise | Load test, compare with baseline |
| Overheat/venting | Overcharge, internal fault | Inspect charger, monitor balancing |
Note: avoid irrelevant topics that derail focus; ensure proper adherence to safety.
Frequently Asked Questions
How Long Does a Lithium Battery Typically Last in Motorcycles?
A lithium motorcycle battery typically lasts 2 to 5 years, depending on usage and maintenance. We emphasize battery longevity and charging maintenance, monitor voltage, avoid deep discharges, and follow safe charging practices to protect performance and safety.
Can I Mix Lithium With Lead-Acid Batteries in the System?
No, we can’t mix lithium with lead-acid in the same system due to incompatibility concerns and charging risks. We recommend using compatible chemistry only, monitor charging carefully, and avoid cross-connecting to preserve safety and performance.
What Is the Best Way to Dispose of Old Lithium Packs?
We’ll dispose of old lithium packs through certified facilities, prioritizing disposal safety and appropriate handling, and we’ll review recycling options to reclaim materials. Follow local regulations, seal terminals, transport safely, and avoid household trash.
Do Lithium Batteries Require a Specific Charger Type?
We can confirm: lithium charger compatibility matters; use a charger specifically designed for lithium packs. In our experience, improper charging can trip safety circuits. Follow charging safety guidelines, avoid mismatched voltages, and monitor for heat during charging.
How Do Temperature Changes Affect Performance and Range?
We notice temperature changes affect performance: colder temps reduce capacity and range, while heat can accelerate wear. Temperature impact also influences charging efficiency, so we monitor pack health and avoid extreme temps to preserve safety and reliability.
Conclusion
We’ve covered the essentials to install a motorcycle lithium battery safely and reliably. By choosing the right chemistry, capacity, and form factor; planning wiring, fusing, and mounting; and verifying polarity and torque specs, you’ll ride with confidence. Use heat-resistant mounting, non-conductive work surfaces, and proper safety gear, and follow staged charging with monitoring. If you stay organized and vigilant, you’ll avoid surprises and keep the bike humming like clockwork—it’s a well-oiled machine, after all.

